In this video, my father paints hair on the head. He takes two preparatory steps. The first is to wash the hands, and wipe the entire surface of the work with a piece of 100% cotton cloth that was moistened with water and wrung dry, thereby removing fingerprints and dusts to clean the surface of the piece. (This step is not shown in the footage, while it is mentioned from around 13:36.)
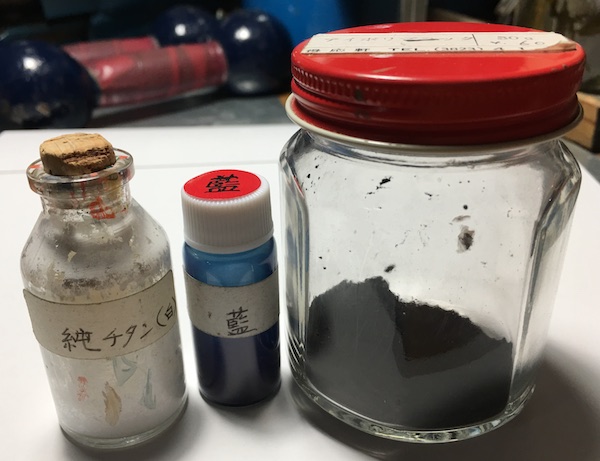
The second step is what is done from the beginning of this video up to around 4:46. That is to apply an extremely faint indigo color (which looks almost white) along the hairline at the nape of the neck. My father uses ai (a pigment of indigo color in Japanese-style painting) and pure titanium as white color. Just before the recording began, he had put a small amount of a wood glue produced by Konishi that was mentioned in the part 6 of this series on a color mixing plate (see the photo below).
Incidentally, Konishi Co. Ltd. produces a variety of wood glues, such as Premium, Quick dry and Multi-purpose. They differ in concentration of glue constituents, and my father recommends the most popular type for the present purpose of making a paint for this type of carving and netsuke.
The glue and pigments are mixed with a small amount of water. The color is so faint that it is almost invisible. After being applied on the work, the color is wiped with a cotton cloth (moistened with saliva). This faint color looks as though the edge of the scalp is slightly revealing along the hairline when the hair on the head is painted black. My father says that this step is not essential. In fact, he sometimes skips it, depending on the work.
From around 4:47 is the painting of hair on the head. My father uses a pigment called “ivory black,” and mixes it with the wood glue and water.
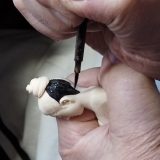
When painting the head, he begins with a side rather than the front, as can be seen in the photo at the beginning of this post as well as in the video. The reason is, as he explains from around 9:58, in cases where uneven parts of the color were amended, the amendments would be more noticeable at the front than at a side (since a piece is more often seen from the front than from a side).
He paints the hair twice. During the first round of painting, he does not care if the color on the piece was a bit uneven, since he can make adjustments on the second round. Please note that he paints the head part (twice), and then moves on to the knot/chignon part (which is shown in the next footage).
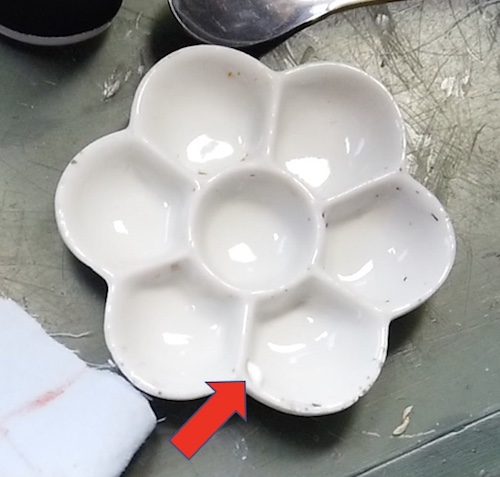
Incidentally, at around 25:52, he covers the mixing plate partially with a flat plate as in the photo below. This is to prevent the paint (semi-liquid mixture) from getting dry.
This post contains affiliate links. Koryuen participates in the Amazon Affiliates Programs. If you purchased a product through an affiliate link, Koryuen will receive a small commission, while your cost will be the same. Thank you for your understanding and cooperation!